When I designed the Afi Chic, one condition was to accommodate a deep armhole and the strap position more toward the center front. But, there are so many bodies and so many particularities, this is why there’s always going to be someone that has to adjust a pinch here and a seam there. I thought I can guide you to adjust the pattern and make it the best it can be for YOU. And I said, let’s start easy and progress in time. The easiest alteration I want to address is adjusting the strap position. Going hand in hand is the armhole adjustment for the time when the cup cuts into your arm.

If I come to think of the alterations, I believe the easiest of all possible adjustments is to alter the bridge width, but let’s address that some other time. Today we concentrate on the cup.
First steps
So, you’ve made a bra. You put it on. Maybe there are visible problems. You note them. Then you wear the bra. This time you discover the invisible problems. You note them too. This list is what you need to change.
Having identified the problems, you have to identify what the solutions are. Maybe choose different fabrics, or change the notions, for instance, use a wider picot elastic. Or, maybe you need to adjust the pattern. Turning to the adjustments, you select the pieces you need to alter.
For the strap position and the armhole on the cup, the adjustments will be carried on the A1 piece – that is the outer cup. Having done it on the main cup piece, you can later do the same for the C1 which is the foam piece.
The key thing to remember is before altering any piece, remove the seam allowances!

I did try my best to make some sketches to help you identify the problems. Inspect the models carefully and see if that applies to you.
Moving the strap more to the center
This lovely lady is modeling a bra where the strap position sits in the armpit. First, it’s not comfortable when you’re moving your arms to the front. And a consequence of the strap placement is that the strap may tend to slide off. Please notice, the armhole of the cup is deep and curve enough. It’s just the strap you want to move more to the center.

So this was the step where you identify the problem. Next is to select the A1 cup piece and remove the seam allowance. Then, we proceed onto the drawing, cutting, and putting back the seam allowances. Click or tap images to zoom in


- Measure how much to move the strap in.
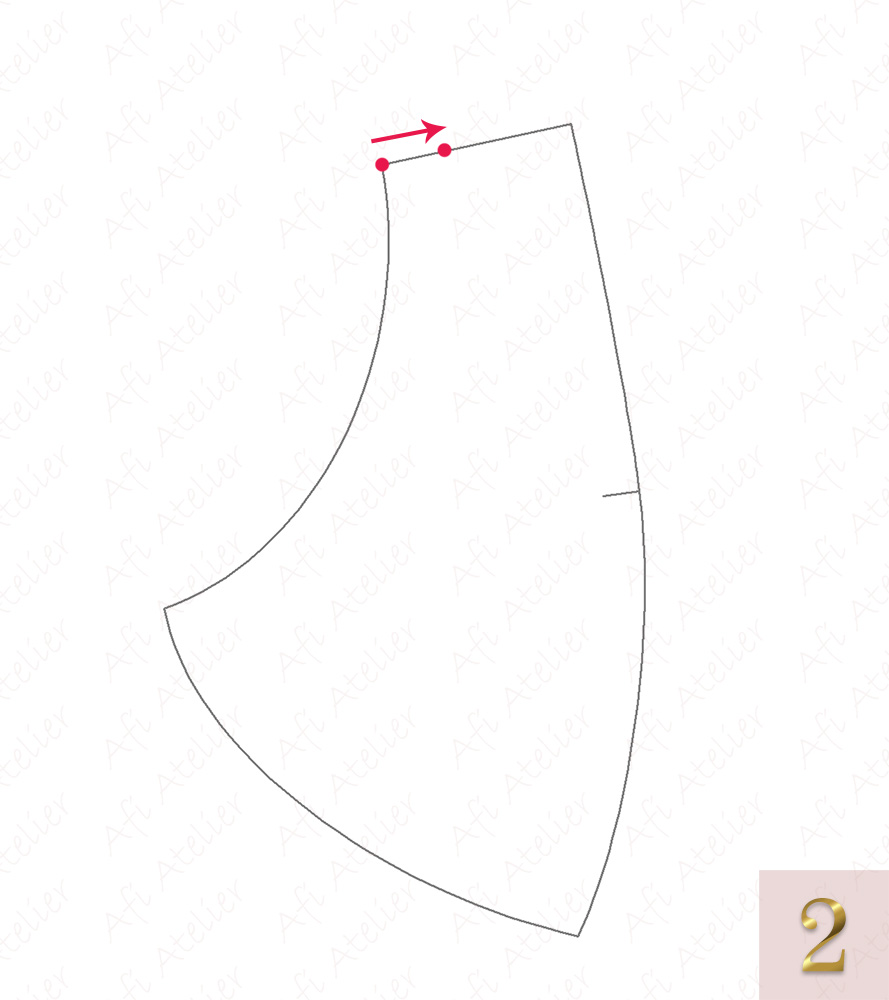
- Apply the measured value to the A1 piece starting from the arm along the neckline.
- Following as much as possible the original curve, redraw the curve slightly moving it away and ending it in the point you measured in the previous step.
- Cut the excess along your curve.
- This is the adjusted piece.
- We need to add back the seam allowances around the piece. If you’re altering the foam piece C1, you’ll need to add seam allowances only on the wireline.
- Pay attention to the width of the seam allowances. They are NOT the same across all the edges! The armhole – the pink one – is where you sew the elastic. This means the seam allowance has to have the width of the elastic. The green allowance is where you join this piece with other pieces. I call it joining pieces seam allowance. This is standard in the Afi Chic bra and has a value of 8 mm which most of the time fits the sewing machine needle position.
- Put back the marks on the upper side. The seam allowance edge is for Style 1. The dashed line (no seam allowance on the neckline) is for Style 2 and 3.
And this was all for moving the strap on the cup.
Moving the strap more to the center and cutting deeper the armhole
This lady is modeling a bra where the strap is also in the armpit, but to her sorrow, the armhole is not cut deep enough. It is like the cup is trying to run more to the side but it’s stopped by the arm. And yes it’s uncomfortable. But it is also when you bring your arms to the front, the arms push the cup fabric and the cup opens at the neckline. Some might be tempted to take a pick of what’s in the cup

To fix this, we will move the strap but we will cut the cup deeper. Get the A1 piece out, remove the seam allowance, and follow the steps. Hover over the images to see the next slide buttons if you’re reading this on your computer or a laptop. Swipe the image left or right to advance to the next image.


- Measure how much to move the strap in and have an idea of how much to cut the armhole.
- Apply the measured value to the A1 piece starting from the arm along the neckline.
- Draw a curve moving away from the original one from the start point to the endpoint. You do NOT follow the original curve.
- Cut the excess along your curve.
- This is the adjusted piece.
- We need to add back the seam allowances around the piece. If you’re altering the foam piece C1, you’ll need to add seam allowances only on the wireline.
- Pay attention to the width of the seam allowances. They are NOT the same across all the edges! The armhole – the pink one – is where you sew the elastic. This means the seam allowance has to have the width of the elastic. The green allowance is where you join this piece with others. I call it joining pieces seam allowance. This is standard in the Afi Chic bra and has a value of 8 mm which most of the time fits the sewing machine needle position.
- Put back the marks on the upper side. The seam allowance edge is for Style 1. The dashed line (no seam allowance on the neckline) is for Style 2 and 3.
And this was all for this adjustment. Now you may ask me, hey Ana, but the alterations look kind of the same. Well, yes, sure you draft a new curve for both adjustments. It is how you draft them that’s different. Because they fix two problems that may or may not be connected. Let’s have a look at them side by side
Comparison of the above adjustments

The first pair of ladies like the armhole of the cup, they just want the strap to move more to the center.
The second pair, besides the strap is displeased with the armhole. Her cup bothers whenever she moves her arms. And here’s the side by side difference on the adjustments for each problem.

I hope you can see how the first adjustment only changes the end where the strap is attaching. Half of the curve is almost the same as the original one.
The second adjustment redrafts the curve entirely and shaves off pretty much from the cup. This is where we eliminate the excess that’s bothering in the armhole.
Most of the time, people need to make the second adjustment. But on some occasions, you only want to move the strap in. Being able to distinguish between the subtle difference is one step closer to having a better bra.
If you find this article helpful I might think of writing more. Would you like to read more about fitting and adjusting? Asking you this, because, I admit, it’s a nightmare to draft and prepare the pictures.
Oh, and one little funny thing. If you look from a distance at the last picture, do those two circles resemble … two nipples? Giggle, giggle.


I love your explanations on how to adjust the fit. It clarifies many misconceptions that I had as to how to modify the pattern for better fit. Thank you very much, and I would like more articles like this.
Ana, gracias por tus explicaciones. A mi resultan muy útiles. Gracias a ellas voy mejorando en la comprensión de la elaboración de lencería, que no es fácil. Sigue así, por favor
Hi, thank you for explaining some of the alteration process. For myself a newbie to lingerie making I am finding a few things very confusing. But after reading through this, I now feel I am would be able (if needed) to carry out these adjustments.