Maya Bra cup was designed for full round breast tissue. And this applies to the upper part of the cup too. What this means is for some of the sewing ladies the cup is not filled completely. Today we tackle how to cleanly adjust the upper cup.

How do you know if you need this adjustment? That’s really simple. If you put your bra on there’s an excess in the upper part. Your breast does not fill that portion of the cup. Your first instinct would be to take a dart. And you’re right! Except I will show you how to work with 3 darts. Having mastered the 3 darts alteration, you’ll be able to increase or decrease the number of darts you need. Let’s dive into it.
BEFORE ANY ADJUSTMENTS
A typical Maya cup has the following pieces: one upper cup piece, two bottom cup pieces.
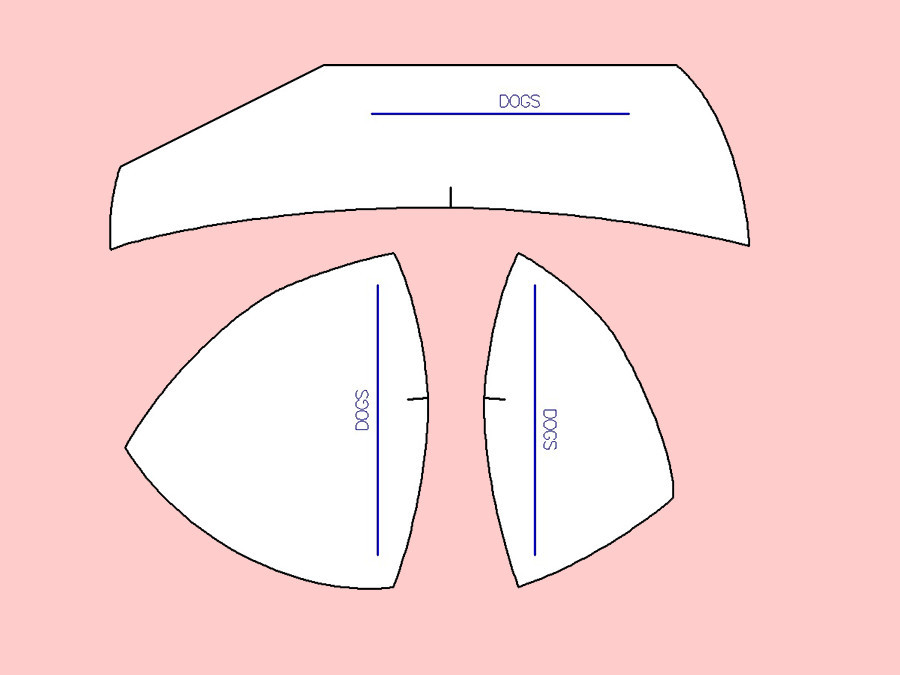
The adjustments
Choose 3 places where the upper cup will be slashed. One is right in the middle where the notch is.
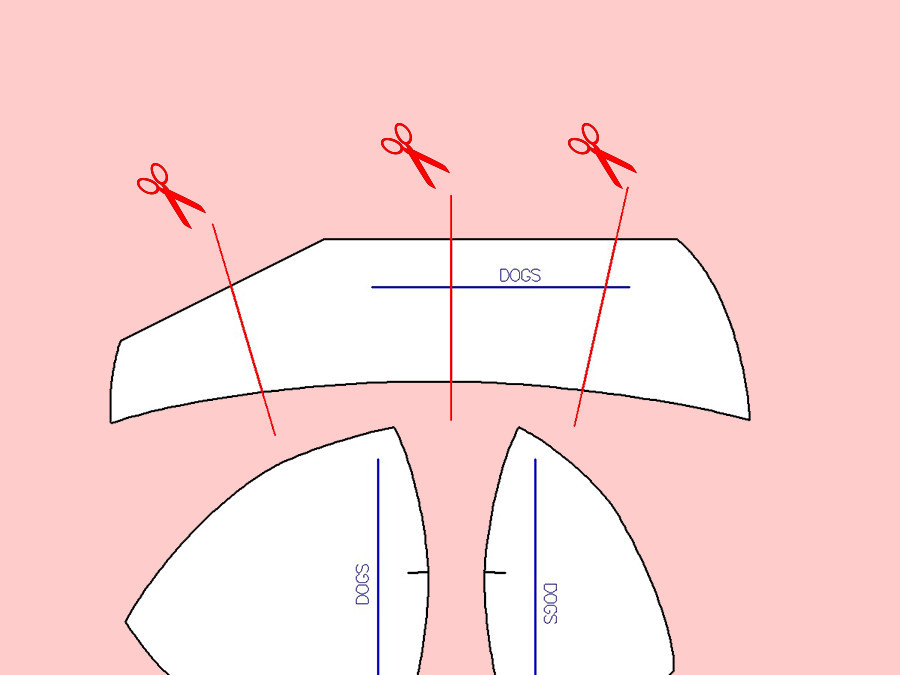
In the next steps, we will rotate the pieces. Please note the center points for rotations. Also, note how many points there are. Because that is the number of times we will be performing a rotation.
The point we rotate about, stays fixed. While holding your finger on that point, slightly rotate the left piece. Tape the pieces together. Start with the left point and progress to the center one. The last one is the rightmost point.


At this stage, we get a distorted upper piece. As a result, some lines are no longer, lines. Some curves have corners. Something like this:

For the underarm and neckline, trace the new lines through the edge points.

The tricky part is to perfect the curve. The only fixed things here are the two edge points. Therefore you have to draft a smooth curve. In addition, the length of the curve from the top piece has to match the sum of the curves from the two bottom cup pieces.
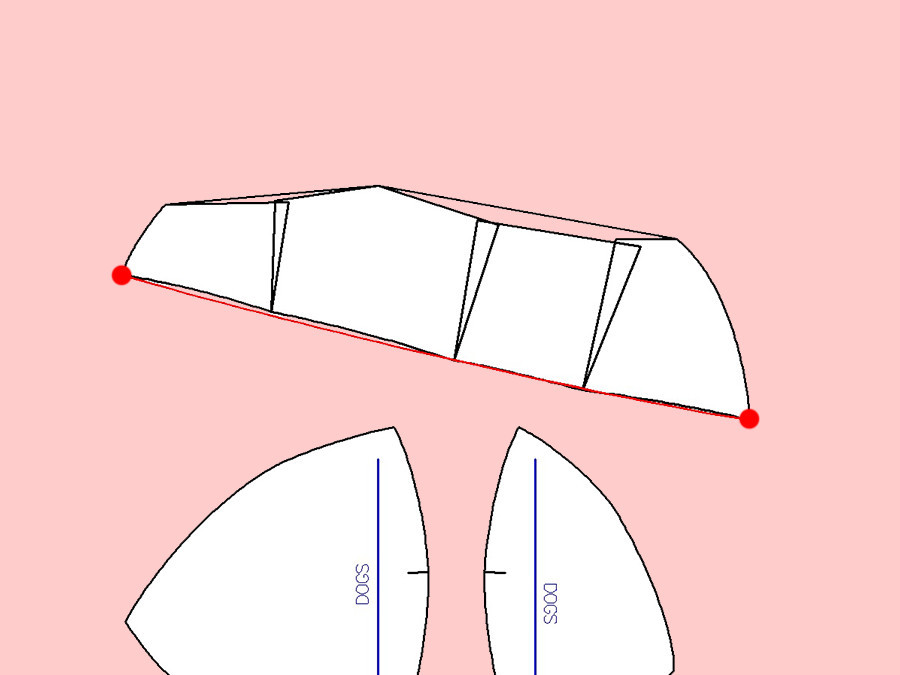

One note for you here. Depending on how deep is the dart, or how many darts you make, the bottom curve on the upper cup piece may have the look:
- similar to the original curve
- a straight line (just like we got here)
- or a curve running down
The last step would be to trace the new adjusted piece on a new paper sheet. Don’t forget to mark the strap point.


How many darts should I make?
This depends on the amount you need to remove. I would say if your dart is less than 1 cm, you can get away with one dart. If there is more volume you need to get rid of, my advice would be to keep each dart at a max of 1 cm.

With the hope that this helps you, I wish you all happy bra-making!
What if the bra cups fit but there’s spillage of breast tissue on the underarm side? And also, the neckline seems too low?
Hello, Ama. Both issues point to one thing: the cup size is too small. You can also check this article https://afiatelier.com/2015/09/maya-cup-detail/ and inspect if your cups fit according to the diagrams.
This is such a helpful post!
This is one of the reasons I have struggled to find bras that fit me properly (others being me not understanding either my size -I am a 75AA/80AAA, or my bust anatomy, because there are not that many stores that actually do carry something in my size…). Since a couple of months I actually do have a favorite bra, but since I am into sewing I would love to make a Maya if it came in my size!
Gracias por esta ayuda con tus patrones voy a necesitar este ajuste particularmente tuve la oportunidad de hacer varios talles de tu Maya bra! es fantástico!me encanta! gracias por compartir! Me tome la libertad de hacer algunas modificaciones en la espalda luego te mando fotos Gracias!=) Saludos desde Argentina
I have not made your lovely Maya bra yet, but when I do, I will need this adjustment. I do not have nice, round breasts at all! More boyish, athletic and flat!