
A few weeks back I got a question about how to change the cup and reduce the vertical distance of the cup for Afi Elegance – that is the Bottom Cup Depth, or shortly named the BCD. The easiest way to answer this is with a complete tutorial which might come in handy for some others as well.
Visit my store on Etsy to browse and shop for patterns
First of all, please know that the Afi Elegance pattern is just a bit different than my other patterns. I made this bra, especially for larger sizes, with more projection. So if you find that you’ve got an extra volume, that is why. And this post here might be of interest to you.
Worth noticing is that reducing BCD reduces only the bottom vertical distance. If you need to reduce the overall cup volume, that would be the reduced projection alteration. And I will do my best to show you that one too.
Getting started
Step 1: To get started with reducing BCD, you will select two cups. One where you love the wire curve length – that is the bigger cup – and where the BCD is a bit too much. For the demo, I chose the EU 75F – UK 34E – US 34F. You calculate how much should your ideal BCD be. And find the smaller cup, where the BCD is very close to your desired length. In this demo, I chose the EU 75D – UK 34D – US 34D.
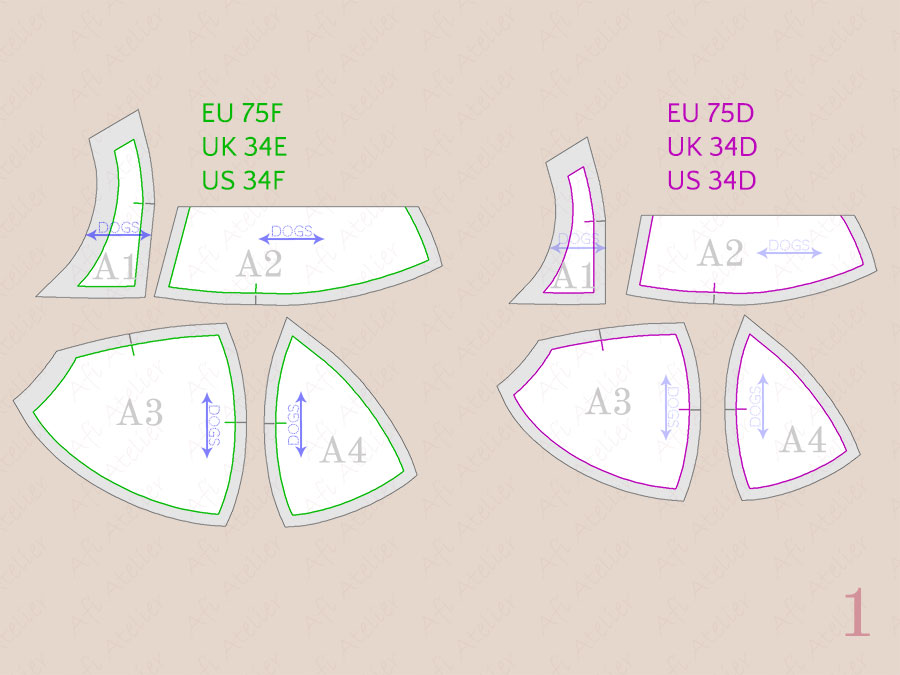
Step 2: Because we’re working on the lower part of the cup, we put aside the upper pieces. And following the golden rule, we remove the seam allowances on A3 and A4 cup pieces for both sizes.
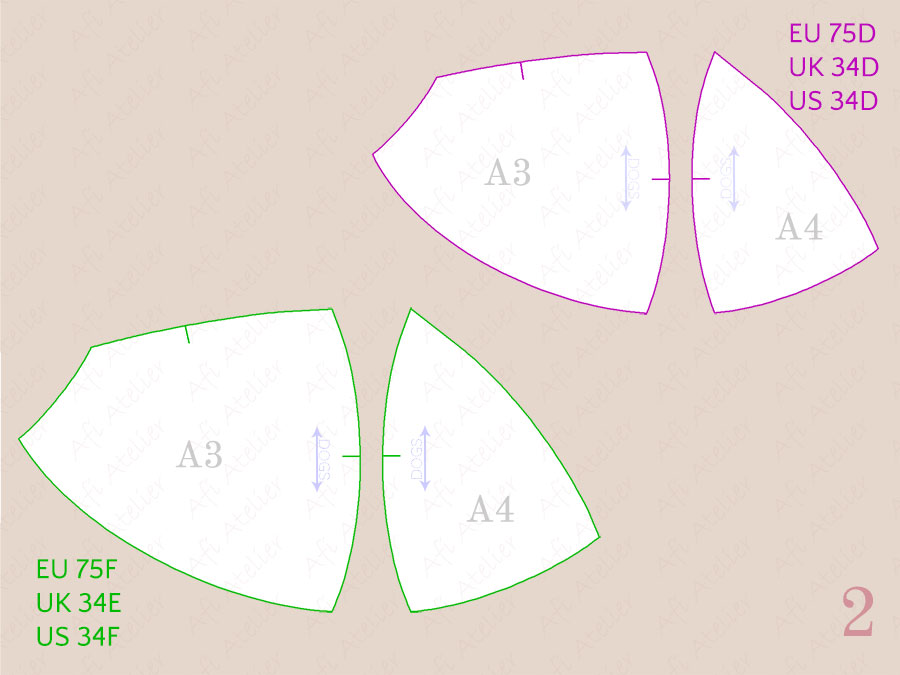
Now we are ready to slash and … overlap! Follow along.
Slash, overlap, match
Step 3: Take the larger cup. Note the critical points: corner points, and the notch on the vertical seam. Those are actually notches number 2. Join points. Then cut starting from the notch. Do not cut entirely! When you’re almost at the end, leave the halves attached almost “on a string”.
Step 4: Now you can slightly move one half on top of the other for each piece. Next up is to observe the critical points on both cup sizes. Points colored with green and pink from one cup size will match points of the same color on the other cup size.
Step 5: This is the trickiest step of all, it only looks a bit more difficult than it really is. For starters, work with A3 pieces only. Remember we have that green cup piece that’s bigger and we slashed it. You have to overlap the halves of it, in such a way, that the green points on the vertical seam match the green points on the A3 smalled (magenta) cup piece. Tape the pieces. Do the same for the A4 pieces.


New piece with reduced BCD
Step 6: Place a tracing paper on top and retrace your bottom cup pieces following the curves. You trace the BCD from the smaller cup size – vertical pink curve. And all the rest are exactly the same as the bigger cup – green curves.
Step 7: Because we have not touched the horizontal seam length, use the upper cup pieces from the bigger cup.
Step 8: The only thing left to do is to add the seam allowance to your new bottom cup pieces. Just remember that on the armhole the seam allowance has to match the width of your upper band elastic.

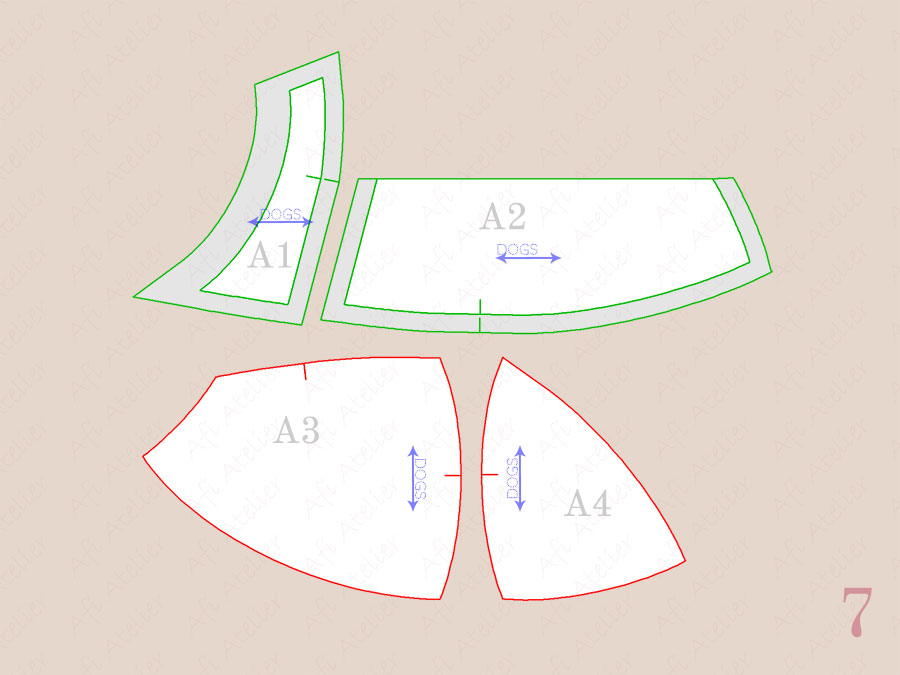
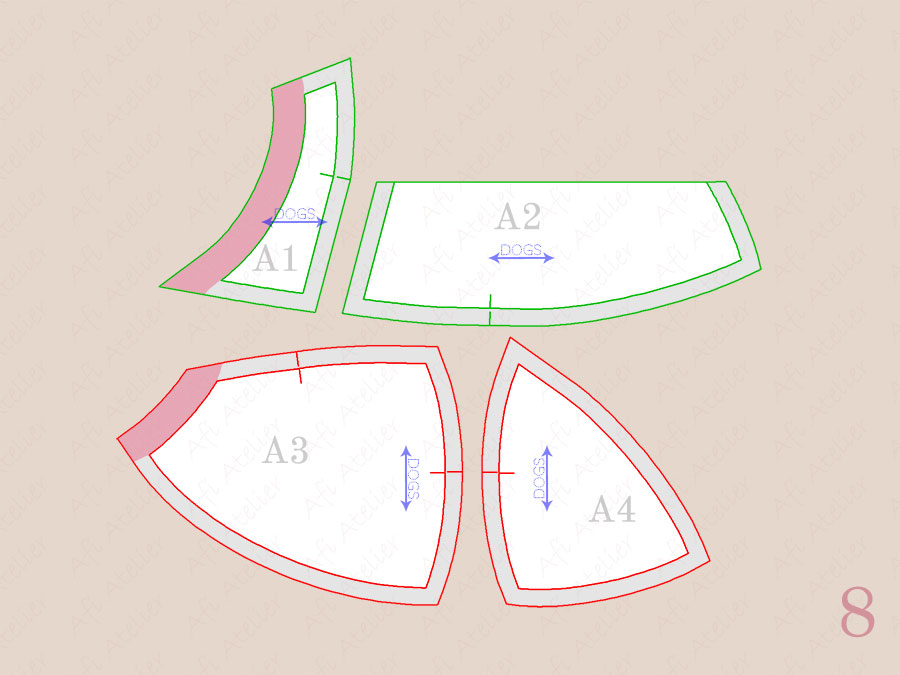
To summarize this whole tutorial to reduce BCD in 3 short steps: slash, overlap halves, match corner points. And I think you can get away without retracing a new piece on a new sheet of paper. Only taping the pieces, and cutting away any sticking corners.


I want more lift though the cup itself fits well. I just fall a bit flat at the upper cup and I want to lift up to round out the top a bit. With this method will there be more volume lost that will potentially need to put into the upper cup again? Is there another method to get the lift up into the upper cup which would work? Do you happen to have a short video showing this adjustment? I’m a better visual learner.
I think you should give this method a try to get more lift. No, you do not need to add the lost volume to the upper cup. By shortening the height you’re forcing the strap to pull the tissue up and you should get the lift effect. If reducing BCD does not work, you can try reducing the height of the upper cup.
Hi, how would I go about increasing the BCD? I fall out of the sizes and am looking into making the bra bigger (underbust + bcd). I love your patterns and have made the Exquisite for my niece a few times. I’m finally trying to make one for myself. 😀
This is a very good question! The method is quite similar, just in the reverse way. You take the cup where you like the wire length, but it does not have enough volume. And then you take the cup where the volume is right. Slash and spread the smaller cup till the end points of the vertical seam match the bigger cup.
Thanks!
Im a little confused, how does reducing the bottom cup depth change the fit of a bra? What breast shapes will this be most useful for? Thanks!
I think this is great for breasts more flat bottom where the mass shifts down. Or when you want/have a lower horizontal seam. This change can be used in a technique to get more lift. With the shorter BCD the strap pulls the cup more.